Showing posts with label cosplay tutorial. Show all posts

Monday, July 20, 2015

Styling Pearl's Wig


Now that I am satisfied the the dye job for Pearl's wig, it's time for the worst part: styling.

Here's what you will need:
Felt, got2b freezing spray and ultra glued styling gel, floral cone, tacky glue or fabri-tac, hot glue gun, xacto knife/box cutter/scissors, sandpaper (not pictured here), hair clips

First off you will want to add some extra wefts to the bottom and top of the wig, because the Lace Mimi isn't quite full enough! Sewing the extra wefts at the bottom will help cover up more of your own hair, since the wig will be gravity defying, and since my hair is dark is likes to peak out of the bottom and is very noticeable! 


There are several tutorials I found about using foam cores as a base to style these gravity defying hairstyles, and I decided to go with a floral cone wrapped in felt as my base. I started by carving the cone into the size and shape that I wanted. Once the basic shape was determined, I began hollowing out the middle just a bit to get rid of unnecessary weight. I used a low grit sandpaper to smooth it out afterward.


Then use a piece of felt that is close to or lighter than the color of your wig. I just went with a very light peachy color.


Now that the floral cone is covered in felt, start covering it in wefts but taking a small section and gluing it down with tacky glue, fabri-tac, or hot glue.

Glue wefts to inside with hot glue and work on section at a time
Should look like this in the end once covered in wefts


Once you have your cone all covered in wefts (note, it doesn't have to be perfectly covered, since it will be covered up more anyway!) it's time to attach the cone to your wig. I used safety pins to test out exactly where I wanted to cone and had to re-position it several times, because once the wig is on your head the position of the cone will change slightly, so it's good to do a lot of test fittings before sewing your cone into the wig! But once you've found that sweet spot, use embroidery floss (all I had was yellow, it's best to use a color closest to your wig!) and a curved needle to sew it on. 
 
Sewing the cone to the wig 


Once the cone is nicely attached (I sewed it on the top, bottom and sides, so 4 stitches in all!) you can very slowly begin covering it with hair and spraying it in place with the got2b freezing spray as you go!

Shaping the hair around the cone
Using clip to keep hair in place while spraying


This part is very tedious so be very patient! I am actually in the midst of redoing mine because I forgot to sew in the wefts before I began, so I will have more updates on the process soon! Feel free to ask questions in the comments below!

Thursday, July 16, 2015

Steven Universe Pearl Wig Dying Attempt: My First Time Trying To Dye A Wig

Pearl from Steven Universe has the weirdest hair color. It's like...a light peachy color? If even? So I have been experimenting with different dyes to try and get a light tint to a blonde lace front wig that I bought for her because the way it was styled already had her bangs and sides cut the way I wanted! 


I started out with a Lace Mimi Bohemian Wig in color 613 (a very light blonde). It is a high quality, heat resistant wig you can find at most beauty stores! However, it does NOT hold color well at all. I got some Yaki brand wefts in the same 613 color and they dyed WAY better. I guess they are just two different types of fibers!
Lace Mimi in color 613 with no styling! All I did was cut the lace a bit.

Anyway, I started off using the RIT box dyes, both petal pink and sunshine orange. I mixed in little bits at a time and tested the wefts in the mixture. They worked well for he Yaki wefts, but didn't work at all for the Lace Mimi, so I would suggest trying these dyes out on another type of wig to get a really good color for Pearl!

Pink and Orange RIT dye


Next I gave Dylon's Flamingo Pink dye a shot. Once again, it dyed the wefts, but hardly made any difference to the wig itself.

Wig submerged in Pink Dylon dye bath


Finally, I gave iDye Poly a try, which is what most of my friends suggested to use in the first place. It dyes synthetic fibers well. And that did the trick! I carefully cut open to water soluble packets and emptied the red and yellow dyes into two separate bowls. I then boiled some water and put about a spoonful of each dye powder into it, mixed it up, and added the hot water to a large tub of water I had to dunk the wig into. I then used only one of the color intenser packets for the entire tub. I apologize, but I didn't measure anything, didn't even keep track of how long I left the wig in. It was all hardcore trial and error! I ended up getting the color I wanted, however, once I rinsed the wig out to make sure the dye wouldn't run while I wore it, most of the dye came out. So I will be updating this soon after I try out one more dye bath tonight! Please feel free to ask me any questions about this process!

Both dye packets separated into bowls


After first iDye poly bath!
Dyes, comb, tub of warm water, and the wig and wefts


Rinsing wig and wefts in cold water and a little bit of conditioner after dying (as you can see the wig lost a lot of it's color after the rinse, so another dye bath will be needed!) 

If you would like to purchase any of these dyes or the wefts you can do so from the links below:

Tuesday, August 12, 2014

Celestia Ludenberg Drill Curl Wig Tutorial


Materials 
 Process
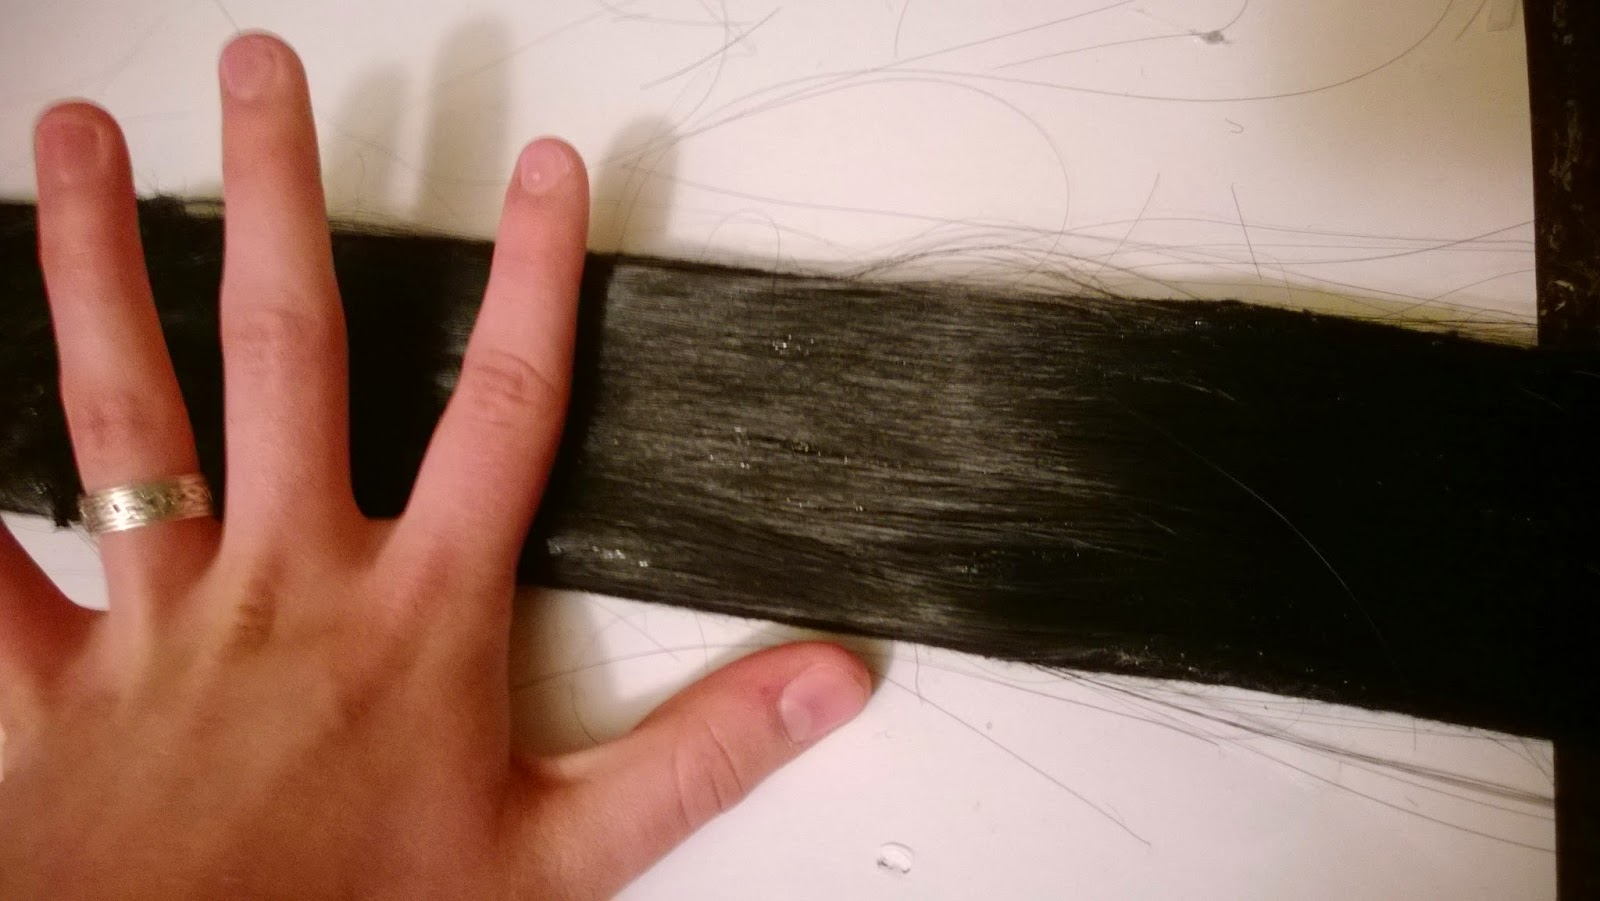
 Cut the chicken wire into 2 long strips. Mine were 2 1/2 inches X 120 inches. Cut enough felt to wrap around the chicken wire and be sure to have some excess felt to tuck under the back with hot glue (which will be the inside of the drill curls, so they should still look as clean as possible!).  
Say goodbye to your pretty extensions! Remove the clip from the extensions and cut out your wefts like so:

 
Once you have all of your wefts cut out it's time to move on to gluing (I used fabritac) the hair onto the felt covered chicken wire base. This will take A LOT of patience. Be sure that every weft piece you use is tangle free and use the comb to guide it onto the glue. I suggest just doing a little bit at a time, and since my weft pieces were short, I had to make sure to blend the pieces together so they wouldn't stick up once the base was curled.
*be extra careful using fabritac glue, it can make a huge mess and while is dries clear, if it gets on the wig hair it will look like a white glob, so make sure to get the glue only where the hair will be covering it up! Lightly pat it down and spray it with the got2b freeze spray as you go. 


And eventually you will have your base! 

And now it's time to curl that base, and this, in my opinion, is the most nerve wracking part because it's tricky trying to form the curls without messing up the glued on wig hair x__x and you really have to wrangle it to get everything in place, but be very careful! I used large safety pins to keep them in place, and use them generously (as in buy a lot!!) because they will snap if there aren't enough. Once both curls are formed and symmetrical to your liking, it should look like this:

Now that everything is in place, it's time to replace those safety pins with the nylon microfilament, which I am just going to refer to as clear thread. I used a curved needled to force the thread through the hair pieces (which is pretty thick after the chicken wire, felt, glue and wefts) and sewing them together very tightly! Sew on all the places that are being supported by the safety pins, treat them like a guide.  

AT LAST YOU HAVE YOUR DRILL CURL! all those pesky safety pins have been successfully replaced with the nylon thread! Looks so nice and clean :D


 Last step is figuring out how you want to mount them onto the wig. There are many different ways to do this! Since my time and materials were limited, I ended up using the hair clips I had taken out of the extensions and sewed them onto the drill curls. I then just glued those onto two head bands (which I also glued together) and then just kept gluing things together until they stayed! Sometimes that's just how cosplay works, but by all means, if you know of a better method, I highly recommend anything else. While it looks kind of sloppy it got the job done and the elevation is exactly the way I wanted it to be!
 (Also it was easy to hide the sloppiness with the bonnet/headpiece)


 If you have any questions feel free to leave a comment or contact me via message on my cosplay page!